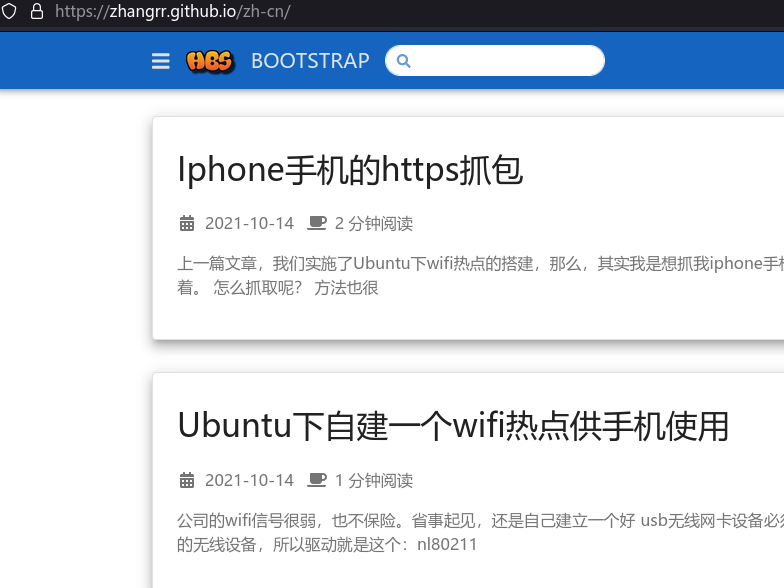
本站这个博客的由来:
源自于 wiredcraft 的面试,这个公司让老八很是向往,可以远程工作,第一次面试是 devops ,老外见面聊了后,由代理中国人面。因为面的是K8S的东西,正好刚给画包包公司做了整体迁往阿里ACK的工程,以为没问题,实际是直接问倒了我。就好比master node上面都跑了什么进程,唉,一言难尽啊,又问到ansible的变量,回答估计也不满意,结果就挂了
知耻而后勇,后面去恶补了一下ansible和k8s的东西,实际也是实际操作居多,然后第二次面的是 sysadmin,全程老外面。还出了几道题,应该是没问题。但是工资要高了,也被刷了。
这个博客就是其中一道题,那既然搭建出来了,干脆就好好用吧。
本身自己对静态的 Blog 系统也比较感兴趣,自己主站 www.rendoumi.com 的 Blog 是由 journey 搭建的,是一个精巧的 go 程序,最妙的是它兼容 Ghost 博客系统,也能使用 Ghost 的 theme ,这样就完美的把自己以前 Ghost 的博客迁移了过去,但是,里面文章有很多过时了,但也不想清理,干脆借着这个机会,从新开始。搭一个自己喜欢的系统继续写新博客
流行的 Markdown 写作平台有Hexo和Hugo,选Hugo是因为实在是不喜欢node,弄一堆npm,迁移麻烦死。
这个博客程序基于Hugo,托管在 github,众所周知,github 是托管静态文件的地方,Markdown的最大毛病是图片。图片放在图床也不是好办法,所以图片和静态文件要在一起,下面就说一下搭建过程,我的主机是Ubuntu:
一、下载Hugo
下载地址: https://github.com/gohugoio/hugo/releases/download/v0.88.1/hugo_0.88.1_Linux-64bit.tar.gz
1wget https://github.com/gohugoio/hugo/releases/download/v0.88.1/hugo_0.88.1_Linux-64bit.tar.gz
2tar zxvf hugo_0.88.1_Linux-64bit.tar.gz
二、初始一个博客写作目录
1./hugo new site MyBlog
三、下载theme
1cd MyBlog
2git clone https://github.com/halogenica/beautifulhugo.git themes/beautifulhugo
3echo theme = \"beautifulhugo\" >> config.toml
四、写一篇新文章
1cd MyBlog
2../hugo new posts/my-first-post.md                                                                                               echo "#### This is another Blog" >> content/posts/my-first-post.md
五、运行server,build草稿
1cd MyBlog
2../hugo server --buildDrafts
六、测试一下
1curl http://localhost:1313
七、推送到github
首先我们要去github开一个xxx.github.io的repo仓库,然后 git 把生成的静态内容推上去就好了
 1cd MyBlog
 2
 3#生成静态文件
 4../hugo --buildDrafts
 5
 6#文件生成的目录是public
 7cd public
 8
 9#正常git操作就可以了
10git init
11git add .
12git commit -m "first commit"
13git branch -M main
14git remote add origin git@github.com:zhangrr/zhangrr.github.io.git
15git push -u origin main
八、看下结果
打开网页 http://zhangrr.github.io 就能看到网页了

九、选择写作软件
其实现在开始才是最重要的,用什么软件来写,就用大家推荐的 Typora 来就好了
 1# or use
 2# sudo apt-key adv --keyserver keyserver.ubuntu.com --recv-keys BA300B7755AFCFAE
 3wget -qO - https://typora.io/linux/public-key.asc | sudo apt-key add -
 4
 5# add Typora's repository
 6sudo add-apt-repository 'deb https://typora.io/linux ./'
 7sudo apt-get update
 8
 9# install typora
10sudo apt-get install typora
十、选择目录存放格式
这个才是最主要的问题,看下图,post目录是所有文章,下面按目录存放,目录名是日期和文章名,目录里面是index.md和文章附带的图片。
我觉得这个模式才是符合我的要求的。
 1.
 2├── post
 3│   ├── 2018-01-11-关联了两款小程序.md
 4│       └── index.md
 5│   ├── 2018-02-05-一款小小的物流数据产品.md
 6│       └── index.md
 7│   ├── 2018-03-19-现已加入 Algolia 搜索服务.md
 8│       └── index.md
 9│   ├── 2018-04-13-我是如何搞砸了本站搜索服务的.md
10│       └── index.md
11│   ├── 2018-04-18-小站构建工具已成功切换到 Hugo.md
12│       └── index.md
13│   ├── 2018-04-19-开始翻译一个文档:Saleor.md
14│       └── index.md
15│   ├── 2018-04-22-Saleor 初稿已翻译完成.md
16│       └── index.md
17│   ├── 2018-04-26-今天全是干货
18│   │   ├── IMG_5991-4755089.jpg
19│   │   ├── IMG_5997-4755064.jpg
20│   │   ├── IMG_5998-4755103.jpg
21│   │   ├── IMG_5999-4755051.jpg
22│   │   ├── IMG_6001-4755073.jpg
23│   │   ├── IMG_6002-4755080.jpg
24│   │   ├── IMG_6003-4755030.jpg
25│   │   ├── IMG_6004-4755009.jpg
26│   │   └── index.md
27│   ├── 2018-05-02-从 Jekyll 到 Hugo 的一些细节.md
28│       └── index.md
29│   └── 2018-05-03-Hugo 的文件管理方案.md
30│       └── index.md
十一、微调 Typora
-
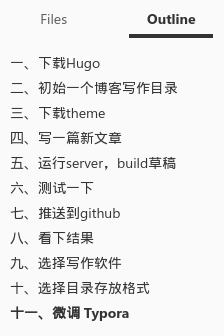
为了能显示目录结构Outline,所以所有副标题需要用
ctrl+2的标题文本,这样就能自动生成Outline -

-
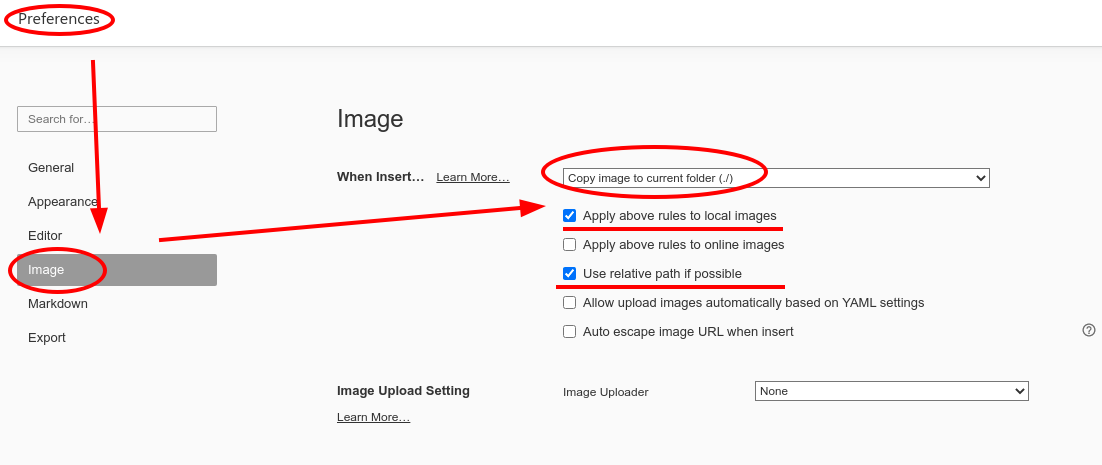
为了能让剪贴板自动把
ctrl+v贴上的图片放到目录里面,需要设置Image -

这样就完美了,以后就在这里写工作博客了。
十二、更新, Typora 的降级
最新消息,Typora 升到了 1.0 ,开始收费了。
免费的最后一个版本是 typora 0.11.18 版本,还好能下到:
下载地址:https://download.typora.io/linux/typora_0.11.18_amd64.deb
回退方法:
1sudo apt autoremove typora
2sudo dpkg -i typora_0.11.18_amd64.deb
3
4sudo add-apt-repository --remove 'deb https://typora.io/linux ./'

